
Tips
|
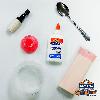
How to Make Slime Hey Everybody! It's Slime Time! Ingredients:
Steps:
For other slime recipes, check out this page |
|
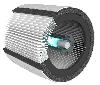
When to Replace Trusens Filters? While Trusens Air Purifier are fully capable of meeting your air purification needs, we recommend the replacement of filters on a regular basis in order to maximize its benefits.
The air purifier will alert you in a red font as to when the replacement should take place.
If you have other concerns regarding your unit, you may contact us or, access the below website for more details. https://www.trusens.com/Photo: Trusens - Dupont HEPA filter
|
|
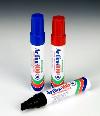
How to Erase Permanent Marking on Whiteboard If you've made a mistake writing on a whiteboard with a permanent marker, here's a trick to help you get rid of it! Use a whiteboard marker to trace the lines you made earlier. After this, use a whiteboard eraser and vigorously erase the traced lines. You will notice that the permanent marker lines should have erased along with the whiteboard marker lines! Repeat as necessary. |
|
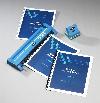
How to Use the CARL Tozicle, Binder Machine The Carl "Tozicle" Personal Punch and Binding System has portable characteristics and a unique design that suits the needs of students and home-based offices. It is compact- fits into any briefcase, carry-on bag, Cropper Hopper or Tote. It is perfect to use for creating presentations, reports and even scrapbook. It can punch up to five sheets of paper or one plastic report cover at a time. Compatible with all standard 1/4", 5/16", or 3/18" 19-Ring Plastic Binding Combs. Carl Tozicle is very simple to use with its 3 steps to punch and 3 steps to bind! First, punch your document 1. Load pages onto the machine 2. Secure or fasten the pages 3. Punch pages down using the lever Next, bind your document 1. Insert binder backbone (i.e. spiral plastic binder, etc.) 2. Lift open the machine cover and insert the punched pages 3. Close machine cover Then, you're set and ready to go!
|
|
How to Use a Craft Punch and Tips! Carla Craft punches are the easiest companion to having fun, delicate and intricate art pieces. Just by selecting a puncher design, punching with cool paper and mixing and matching shapes, you can make cute invitation cards, captivating picture frames, hip scrapbook pages and funky gift boxes! Here are the awesome suggestions from our artists:
Now, it's your turn to create! |